I was fortunate enough to get a real birdseye view as I rallied Vermont schools into showcasing their participation in a special site I set up a few years ago especially for this purpose http://thinkaboutcode.blogspot.com/
Thanks to today's amazing technology and lots of Verizon cell data (75 gigs) I spent most of last week collaborating with my Vermont peers from about 3000 miles away. It was a fabulous week.
Hundreds of kids from around Vermont built their awareness (and confidence) with computer science! Over two hundred Vermont schools signed up to participate in Code.org's Hour of Code event. Check out our showcase of Vermont participation at http://thinkaboutcode.blogspot.com/ or get a really quick two min glimpse into what Hour of Code looked like in Vermont with the following video.
And for a closer look, check out the collection of pictures you all submitted directly to Vermont’s Hour of Code site in our 2015 Gallery.
Many of Vermont educators created your own multimedia stories. They were AWESOME! I added them on the Featured Stories page.
Some schools had guest speakers come directly to their school, while others were able to interact with guest speakers remotely as made possible by today’s Video Conferencing technology (such as Google Hangout or Join.me). Thank you to Peter Drescher and the Agency of Education for recruiting some great role models for our students to interact with. The great thing about this guest speaker series is that you can view the archive (or parts of them) anytime that works in your instruction. Snippets ranging from advice to girls from female coders to troubleshooting excerpts can give students a glimpse into the world of coding outside our schools.
Some schools participated in making the Robot Rodeo Announcement as an opportunity to continue coding beyond and hour of code. From January to May, Vermont schools will be hosting (and training through code) a fleet of fun codable robots in preparation for an upcoming Robot Rodeo. If you know a Vermont school that might be interested in hosting a robot, or know someone who would want to sponsor a robot, check out
And if you are an educator who would like to grow your own ‘ability to code’, why not do it together through the upcoming January course (online) at Marlboro College - CREATE WITH CODE, EDU621D.W16 designed for educators with Little to No experience to gain confidence with code and how to integrate it in their classroom. Marlboro College Graduate School CREATE WITH CODE, EDU621D.W16
Note: If your a Vermont school and want to see your specific school’s submission to the http://thinkaboutcode.blogspot.com/ , just click on the hyperlink tag with your school’s name. Some of the submission had no names, so I tagged them “NEWS”.
You can simply click on each day’s submission tag.
As our Bluebird bus drove by mesas, cacti and other desert landscape on our way from New Mexico to Tucson, I spent the day gazing outside my the passenger window (my mobile office) while pursuing one of my passions- fueling innovation and creativity in our schools.
My day was filled with opportunities to encourage students and teachers to participate in Hour of Code week. The day started by helping Peter Drescher from the Agency of Education facilitate a guest speaker through video conference with the fourth grade students at Chamberlin School.
Megan Harney from Midas Education explained to the class that computer programming was all about conditionals and loops. She helped the students think about different things in their lives that used conditionals and loops ranging from deciding on whether to use an umbrella to shoveling snow.
The students chimed in with their own question. One student asked for advice on getting more girls to like coding, explaining that she herself LOVED programming. Megan’s advice was spot on - Just do it, and the more you do it, the more confidence you will feel. The advice was encouraging! However, Megan did go on to say that all the programmers she works with are male.
After their video conference with their guest speaker, the fourth graders from Chamberlin school ran off to do some of their own coding using Scratch. Their goal was to complete Google’s CS-First’s Hour of Code Lesson - Sailing the High Seas to learn how to code using Scratch and then to use a Makey Makey to control the action of the waves and to trigger some suspicion noises in their storyline.
and updates on Twitter. So proud of my Vermont colleagues for participating in this event and being part of the Vermont school presence in this fantastic event. Go Vermont
Recently I received a help request from a colleague who was preparing for the upcoming Hour of Code activities during Computer Science Education Week. My colleague wanted to use a Makey Makey during the week and wanted my help getting started using the Makey Makey to learn about code. Overwhelmed from the wealth of resources, she asked “Where do I start? Hour of Code is next week, and I have no experience.” I created this Hour of Code Mashup for Makey-Makey, Scratch, and CS-First step by step lesson with her (and others like her in mind). If you try it out, please reach out with feedback and ideas for improving it or to share your student creations.
In my opinion Hour of Code should raise awareness for students AND teachers of learning opportunities and motivate us to explore these further. An HOUR of Code (or two) is not the end goal. Therefore I have created an activity that blends three of my favorite resources together to have students experience CREATING with Code combining the digital and physical world. I hope that after this activity students will be eager for more and pursue exploring these amazing opportunities.
This site is filled with opportunities for student to IMAGINE, CREATE, PLAY, SHARE, REFLECT and LEARN. Their is a wealth of resources for students and teachers who want to learn with SCRATCH.
If you are looking for a Ready-Made Step by Step guide to teaching students computer science with SCRATCH, this is the place. It includes lesson plans, videos, lesson plans, handouts, badges, certificates, and everything you need to implement theme based learning opportunities. There is even a teacher dashboard to help you keep track of self directed student progress. If you check out my Hour of Code Mashup using Makey Makey, Scratch, and CS-First Step by Step Lesson, I hope you'll share what you make, how you used it, or send feedback to make it better.
For several years now I've been designing intensive summer institutes that model instructional strategies and give educators a chance to learn and practice new tech skills and create projects that will use those new skills to support teaching and learning in the upcoming school year.
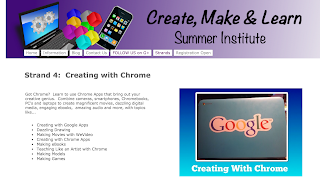
This year we decided to end our intensive week together at Google Tools for Schools Summer Institute in Vergennes, Vermont creating a collaborative movie that celebrated our learning.
After watching the video K-12 Vision of Today's Students, I gave the group a little pep talk thanking them for taking a week of their summer to get ready for the new set of students about to walk through their door in a few weeks and told them that it was important for them to take the time to celebrate their own learning.
We asked each participant to find a partner to celebrate something they were proud of in their own learning this week and share it with a partner. It was hard to interrupt the enthusiasm that filled the room as the conversation grew louder and more animated.
As I passed out colored markers and construction paper, I invited each educator to be part of a collaborative movie. I asked each of them to create a sign that was easy to read that would highlight one of the things they were proud of about their learning journey this week that they would hold up for a few seconds in front of a Green Screen we had set up.
It didn't take long for each of the participants to walk in front of the green screen and hold their sign up for 5 seconds, while one of us used a tablet to record their cameo appearance in our movie. Note to self: Don't use Green paper or Green markers when working with ChromaKey!
It was our goal to use the ChromaKey feature of WeVideo to produce our movie. Unfortunately we ran into some difficulty in that the combination of green cloth and lighting did not produce the results we were hoping for. After some problem solving, we did find that if we had used the darker green cloth in my toolkit, the masking would have worked well in We Video (Note to self: test a sample video directly in WeVideo before filming the whole video).
Fortunately, the iPad we used to film had the DOINK which was much more forgiving and we were able to do some of the production work using the DoINK app directly on the tablet.
We quickly found and downloaded some public domain images of balloons and fireworks from Pixabay to use as a celebration background and added them to our unedited 7 minute video using the DoINK app. Happy with the results, we saved the video from the DoINK app to the camera roll of our device.
After moving the new version of our 7 minute video from our tablet to our Google Drive, we were now able to import it directly into WeVideo for some additional editing. It didn't take long to split the clips and remove unwanted parts of our video so we had a quick 5 second clip of everyone's learning.
We added a title and ending image to our video and played around until we found one of WeVideo's themes that gave us the effect we wanted.
The final step before saving was muting the original sound on the video clips so we only had theme music and not our 'stage directions" in our final movie. This required clicking on every clip and hitting the mute button. Note to self: Next time MUTE the CLIP before you SPLIT the Clips if you don't want the original audio. Would have saved us from having to mute each clip individually.
After previewing the collaborative movie, we decided that even though it was not perfect, we felt it accomplished the goal of giving us the opportunity to reflect on and celebrate our learning. Click FINISH! Publish to Google Drive and YOU TUBE! And VOILA! A nice artifact to celebrate our learning, along with the 28 fabulous projects we created this week using Google tools - which we plan to share at the end of the month.
Goals for next time
1) Test the lighting and green screen combination directly in WeVideo before filming the whole movie.
2) Use the Collaborative Feature of WeVideo to give everyone a chance to tweak their own part of the movie.
But for now... Celebrate with us... as we share our Collaborative Movie of our learning journey during August 2015 in Vergennes Vermont.
For those who are ready to give WeVideo ChromaKey a try, check out the following resources.
This week I had the benefit of attending a two day workshop lead by a master facilitator, Liz Lerman, where we learned about and practiced using her Critical Response Process for giving and getting useful feedback on anything you make - from dance to dessert. I was intrigued by the description that this process "leaves the maker energized and eager to get back to making. " And sure enough, the two day workshop left me in the promised state. I'll blog more about the fantastic two days and the wonderful creators/makers I met in a future blog post, but this morning I woke up thinking about one particular piece of feedback that I received when I asked my feedback group "do you see a mission in my work." Amongst several comments, one particularly struck a chord with me - "Yes, I see that you are humanizing technology".
I'm not sure I would have picked those words to describe what I do - and not sure its my mission, but I do see this theme in the types of technology I'm attracted to and how I create and make with technology in ways that does 'humanize technology."
I remember getting all excited when I saw the first laptop whose display swiveled and laid flat, and knew I had to have it as my next laptop. Not because of the coolness factor, but because I felt that I would now be able to be in a meeting with someone without the screen/keyboard of our computers creating an artificial barrier/wall. I believed in this so much that I actually took out my credit card and purchased 10 of these while working in a school to to test my theory. And although I did not use those words -- the fact that it humanized the technology was part of the reason I was excited about this form factor in a laptop. (Remember that this was in 2003, several years before iPads and other tablet computing had been invented).
A similar sense of excitement came over me as I discovered the collaborative power of Google Docs in 2006 and I quickly set up St. Albans City School to become one of the first Google Apps for Education schools in Vermont. Collaborating (both synchronously and asynchronously) on a document was a game-changer for many ways, but perhaps one reason was that it humanized technology. It's a little hard to describe, but I think you'll get the idea from this video clip I recorded after stumbling upon what sounded like a pajama party in the hallway of St. Albans City School. Turns out this group of giggling girls huddled together over their laptops were co-creating a sequel to a play they started to write last year on their school Google Docs account after school hours (not an assignment) from their respective homes. Why? Because they could - and perhaps because the collaborative features of Google docs made it a social activity that they could do together after class from their own homes, or even while they were together sitting side by side in the school hallway. The tools distributed power so that everyone had ownership to the piece (anywhere, anytime). When was the last time you heard students say "It's really fun, it not really like school, it just really fun" about a piece of writing? Feels pretty human to me!
The participants who had called my work "humanizing technology" may not have been aware of this theme in my past work, but somehow they saw it in some current projects I shared with them during the Critical Response Process. This comment definitely informed my process of making that I'm going through with this emerging project idea - "a mobile studio for creating and making collaboratively".
The trouble I'm having with the words "humanizing technology" as the mission - is that I don't see technology as the OBJECT in my mission. Humans are the object and technology is a tool to "DO SOMETHING ELSE". But what is the something else and how do I articulate it?
With my Tech Savvy Girls and my Girls Make It project, technology is only the vehicle to efficacy, confidence, and skills that can be a gateway to so many different types of careers. So I'm not trying to "do something" to the technology - I'm trying to change the girls, or the choices they have that I'm trying to change.
When I'm doing a project that leads educators to using technology in new ways, I'm less concerned with their using technology to make their life easier, as I am in helping them become more confident with emerging technologies and more aware of the possibilities it has to design instructions where students are creating and making as a mode of learning. For example, our schools have invested in thousands of dollars of computer stations (iPads, Chromebooks, laptops) so they could fulfill the requirements of administering computerized high stakes testing. The reason the computers came into the school is disturbing to me, but the opportunity is presents is exciting. Let's leverage this new technology as a vehicle for creating and making with kids. Let's make movies, make music, or create games that engage students in active learning. Knowing that most of these computers were Chromebooks with limited video creation options, I sought to raise awareness (and skills) of educators for using the Chromebooks to create and make.
Second I negotiated consortium level contract with WeVideo ( a cloud based video editing solution) that would yielded a 60% savings for WeVIDEO EDU licenses for Vermont schools. In just a few short weeks, the interest in using WeVideo with Vermont students grew to over 10,000 licenses. So again, the goal was not to "humanize" the technology, but to use the technology as a vehicle for something "more". But what is the "more"?
In this case, the opportunities for students to CREATE and MAKE in schools! This does lead to more multi-modal expression of student voice, more active learning, more opportunities to create and make (movies, mixed media, podcast, narrated art, etc). So yes.. it is a more humanized used of technology than (current use of high stakes testing or research papers). But is the fact that it humanizes the technology the mission? Perhaps not, but there is certainly some humanizing of technology in this project, too.
There is more... so much more..but it does feel there is something important here and I'm left struggling with wordsmithing the mission to something where "humanizing technology' is an integral part of 'my mission statement". Just haven't quite figured it out yet, but I think I'm closer. (Any suggestions welcomed to the question I'm asking myself lately "If Lucie combined the many hats she wears into one identity using a mobile studio for creating and making collaboratively, what might be the mission statement that could capture what I'm creating and making by doing this?"
Navigating a 3D world can seem pretty overwhelming to someone like me who has not spent as much time as today's students leveling up in 3D gaming environments. However, today's students are much more comfortable finding their way around in a 3D world, so why not let them create in 3D with one of the most user friendly digital tools for 3D modeling ~ TINKERCAD.
Why TinkerCad! It's not only a very user friendly and powerful 3D creation tool, but it also works on both personal computers and Chromebooks! Don't take my word for it, check out Kevin Jarrett's first graders using TinkerCad in the K-4 STEM Lab at Northfield Community Elementary School.
Although it is very accessible, there is one barrier for teachers who want to quickly get started using Tinkercad by AutoDesk with students under 13. In order to be COPPA compliant when using Tinkercad, students under 13 need to be approved (thus supervised) by a parent or teacher. If a student under 13 signs up to use TinkerCad, they will be able to navigate the beginning lessons, but will not be able to save their work until approved.
Thankfully AutoDesk has streamlined this process. First of all, students under 13 will automatically be asked for a parent email address and an email will automatically be sent to the parent email address. This step helps to streamline the process, but there are still challenges for students whose parents don't have email or for students whose parents don't get around to "approving' their students in a timely manner.
Luckily AutoDesk has provided some avenues to help teachers with this challenge and quickly get their students up and running using TinkerCad.
#1 AutoDesk has included in their terms of service a reference to the fact that in some circumstances, teacher consent can be used in lieu of a parent. Thank you, to AutoDesk for taking the extra step to include this phrase in Tinkercads terms of service. This is very helpful for teachers who are working hard to be responsible users/educators while using innovative digital tools with their students.
https://www.tinkercad.com/about/privacy#privacy-13-1-1Teacher consent in lieu of a parentFor school-based activities, COPPA allows teachers and school administrators to act in the place of parents to provide consent for the collection of personal information from children. Schools should always notify parents about these activities.In some cases, in order that an account is not closed and so that a child can continue to use a website or application outside of the school context, we may ask schools to obtain consent directly from a parent instead of and/or in addition to providing consent in the place of a parent.For more information on parental rights with respect to a child’s educational record under the U.S. Family Educational Rights and Privacy Act (FERPA), please see the FERPA section below.
#2 AutoDesk has created an environment where teachers can easily manage (and approve) their students and QUICKLY get started teaching their students how to model in 3D. If you have not discovered it yet, check out Project IGNITE by AutoDesk. In less than 15 minutes, I helped a middle school math teacher create an account on AutoDesk and set up two classes he was planning to teach later that day using TinkerCad. But the dashboard for quick and easy classroom management is not the best part about Project IGNITE -- the BEST part is the fantastic ready made self-paced lessons (aka Projects) that teachers can assign to the students.
#3 Once a teacher has approved his/her students using the Project IGNITE classroom dashboard, the students can immediately get started with PROJECTS that the teacher has assigned as lessons to each classroom section of Project IGNITE. Students can also move right over to TINKERCAD and use their newly approved account to create their own free form designs on the TinkerCad work plane. Simply have your students access www.TinkerCad.com after having logged into their Project IGNITE account. As a professional educator, I would still make sure that my students' parents are engaged with the process of 'co-supervising' their child's account and have developed strategies to do that in my schools. But by starting with Project IGNITE first, and then moving over to TinkerCad's free form space, teachers can start using TinkerCad with students the same day!
And as an enthusiastic eager teacher who likes to use innovative digital tools with students, I am much appreciative of everything AutoDesk has done to streamline the process of using this powerful tool in our classrooms with even our youngest learners. The process is well thought out and provides a streamlined workflow that removes barriers for teachers who want to use TinkerCad with younger learners.
Note: The Project IGNITE lessons are quite text heavy and might be challenging for struggling readers and would not be the best entry-point for our youngest learners. Even with my middle school students I suggest toggling back and forth with the tutorial mode of Project IGNITE and some open-ended exploration and teacher demonstrations directly in TinkerCad.
Leah Joly and I had 'great fun' teaching science teachers how to use eTextiles and other Soft Circuits to create models that explain phenomena at the Vermont Science Teachers Association Conference. Our workshop "Next Gen Can be Sew Fun" started as an inquiry into the potential that Maker Ed has to support teaching and learning in science. This inquiry lead me to amazing resources about eTextiles, Soft Circuits and about the creation of models as a practice in Next Generation Science standards.
The best part of the workshop was how much we learned about the PROCESS of learning through creating models by actually CREATING our own science models to showcase during the workshop. That process validated my 'theory' that maker skills and tools can support the process of learning in science.
By being familiar with how to create both parallel and serial circuits (a 4th grade standard) I was able to access the concept that the loss of energy as it moves through each LED powered by a battery in a serial circuit, was much like the loss of energy moving through a food chain.
I definitely went through each phase of the creativity cycle from IMAGINE to PUBLISH as I created my Food Web Model.
As a learner I started to imagine the design of my model. My imagination was limited to my own mental model of the food web and the materials I was familiar with. Since I was familiar with the way the serial circuit worked from recent adventures in "making", I was able to imagine the energy in a serial circuit working the way the energy in a food web worked.
But as I started to CREATE and PLAY with different materials, I did lots of RESEARCH to make sure that my MODEL accurately represented my growing understanding of the food web. It was important to me that the example I used was scientifically accurate. As I shared my idea with others I was also sharing my mental model, explaining which materials I chose and how they symbolized various levels of the food chain.
I used a tool called Build in Progress to capture my process and explain my thinking. Sharing the process (not simply the product) through a tool like Build a Progress which was designed with sharing the PROCESS in mind would allow a teacher to provide better feedback to students at various points in their process to more students, yielding more opportunity to REFLECT by both the teacher and the students during the process of building. And with that reflection came more iteration of the design as my mental model went through its own iterative process, growing in accuracy and closer to the conceptual model that accurately represented the food web in Lake Champlain.
In MAKING the act of PUBLISHING does not mean that I would be publishing words (as in a book or paper), but that I would be completing a PRODUCT (thus publishing) that would be shared with others. The Build in Progress Food Web Model was one way to publish, but so was the sharing of my artifact with other colleagues. My desire for my model to be scientifically accurate was increased because I was investing myself into something beautiful, something I made with my hands that was not simply a drawing where I labeled consumers and producers on a paper diagram. The whole process created a deeper understanding of both the way energy flows through a serial circuit and through the food chain. and set me right up to imagine more possibilities in making and in how the world around me works.
The following slides are filled with ideas, academic research, examples, tutorials, and resources that we were able to organize around the topic of using Soft Circuits as a tool for creating models in science education.
And to top it all off, we learned a lot about each other as we watched our colleagues express themselves in very different ways with the materials we made available to our participants.
I love to work collaboratively.
Whether in the same room or miles apart here is a quick and easy way to use YouTube Editor with colleagues to create a quick and easy collaborative video project. Recently 4 friends and I created a quick Happy Birthday Video for our friend Elizabeth from 4 different locations.
This can be a convenient workflow to use with students. Your students are sharing quick pics and quick videos with each other using their mobile devices. Why not have them share their learning with you using the same devices.
Step 1: Make sure you have a YouTube channel. After I started using this method more frequently with students, I created a separate YouTube channel just for these types of project.
Step 2: Locate the special email address for mobile uploads by email that YouTube generates for you. You can find this this under Overview
Step 3: Share this 'special' email address with students. This is best used in a group where there digital citizenship and collaboration is part of the culture. Since it not an easy email address to communicate, I find that sending all my students the address via email, makes it easy for them to add to their contact list. (You can always reset the 'confidential' email address if you find some students were not as 'ready' as you expected.)
Step 4: Ask all participants to use their devices to complete a short video in response to your PROMPT. (SHORT is key email systems will not allow you to email long videos. I would start with 15 seconds or less and test longer videos if necessary.
Step 5: Check the Video uploads section of your YouTube Channel. You will find the new videos automatically appear here.
Step 6: Use YouTube Video Editor to remix these clips to make one fun fantastic video project.
Recently I have taken on a professional inquiry seeking ways that the tools and skills found in maker-spaces can be used to meet Next Generation Science Standard. As part of this inquiry, I had the good fortune to meet Jennifer Liguori as she and her students were using a 3D printer and laser cutter from their maker lab to design pieces that would be used with the Ardunio microprocessor they were programming as part of a design that would be used in an upcoming Balloon Launch.
Last week, students at the Center for Technology at Essex had an out of this world experience, that will most likely become one of their most vivid memories of high school. On April 15, 2015, they successfully recorded the flight of a man-made balloon into the stratosphere and back, navigating their way through real world challenges that ranged from powering a data-logging Arduino through subzero temperatures to retrieving the payload in the midst of Vermont’s infamous mud season.
This type of project-based learning is the type of learning that students remember. It’s not knowledge that’s easily forgotten after the test. It’s real world learning and problem-solving that inspires students to obtain deeper knowledge and inquiry than any text-book could.
This inquiry driven project based learning environment doesn’t just happen. It takes a masterful teacher to design project based learning that is powerful and meaningful, and as I interviewed Jennifer Ligouri, science teacher at Essex Technical Center, it was evident to me that her passion for kids, passion for learning, passion of science combined with masterful teaching were at the heart of this exciting and successful experience.
Listen to Jennifer describe the design of the project, the pre-flight testing, the flight, and the challenges that Vermont's mud season and lack of cell service brought to the chase and retrieval of the balloon's payload, and the successful retrieval of data collected during flight.
As you can tell from listening to the interview above, instrumental to this project was access to affordable technology tools that are empowering a new generation of innovators, makers, and problem-solvers.
Tools like 3D printers, laser cutters, Arduino microprocessors, sensors, spot GPS technology, and ultralight cameras, were all part of the design created by the team from Center for Technology at Essex.
These tools are becoming more and more accessible to students with the growth of the maker movement in our communities, not only in terms of cost and availability, but also in terms of people who are sharing their knowledge and experiences in how to use these tools. Whether it be through the local maker community or the global connection made possible through the Internet, today’s students can pursue solutions to challenges like making a balloon that will reach the stratosphere.
The student have decided to enter their project to compete in several categories of the Global Space Balloon Challenge including highest flight, best pictures, and first balloon flight design created with maker tools such as 3D printers and laser cutters.


 Some schools had guest speakers come directly to their school, while others were able to interact with guest speakers remotely as made possible by today’s Video Conferencing technology (such as Google Hangout or Join.me). Thank you to Peter Drescher and the Agency of Education for recruiting some great role models for our students to interact with. The great thing about this guest speaker series is that you can view the archive (or parts of them) anytime that works in your instruction. Snippets ranging from advice to girls from female coders to troubleshooting excerpts can give students a glimpse into the world of coding outside our schools.
  Some schools participated in making the Robot Rodeo Announcement as an opportunity to continue coding beyond and hour of code. From January to May, Vermont schools will be hosting (and training through code) a fleet of fun codable robots in preparation for an upcoming Robot Rodeo. If you know a Vermont school that might be interested in hosting a robot, or know someone who would want to sponsor a robot, check out