
If you are following my my journey back into the world of Pi, you know that this series is meant to document and reflect my process and point out the little things (both technical and not) that might help the real newbie gain confidence as they grow their maker skills and develop a growth mindset.
In my first post, I shared some backgrounds on my attempts to venture into the world of Pi.
In my last post, I tried to prepare you for some of the chicken and egg scenarios that might derail you as you gear up to use your Pi Zero. Basically there are two important steps to starting out
1) getting the operating system installed
2) getting a monitor or display up and running
You can't really do one without the other. In my last post, I mostly talked about getting your monitor or display set up - but you can't really do that until you have an Operating System running your Pi Zero. So these next few post are really quite intertwined. I'll start with installing the Operating system on a Mac, then offer a post for doing the same on a Windows machine, and finally share the troubleshooting I went through to deal with my display/monitor issues in the following post.
But for this post let's stick with installing the operating system on a Mac!
I'll share my Windows journey in the next post.
What is an operating system?
According to Webopedia ....
The operating system is the most important program that runs on acomputer. Every general-purpose computer must have an operating system to run other programs and applications. Operating systems perform basic tasks, such as recognizing input from the keyboard, sending output to the display screen, keeping track of files anddirectories on the disk, and controlling peripheral devices such asdisk drives and printers. ...Webopedia

So basically your Pi Zero did not come with its most important program - the Operating System-- which basically means it can't do anything until you figure out how to install an operating system for your Pi Zero.
If you purchased your Pi Zero as part of a kit, there is a chance your kit included the operating system already installed on a microSD card.
If not, you’ll need two things to get started.
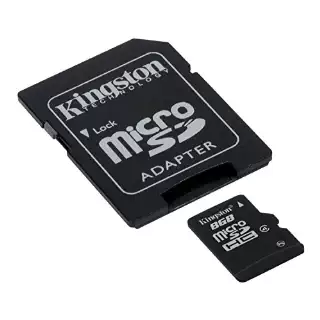
- A 8 gig micro SD card and adapter (about $5.00)
- An Internet enabled computer with an SD card slot
The recommended Operating System for the Pi Zero (at this time) is called Raspian Jessie.
You can find both Raspian Jessie and instructions for installing it on the Raspberry Pi download page. But honestly… these instructions were intimidating to me!
For a newbie like myself, the ADAFRUIT Learning center had much better instructions.
The Adafruit tour of the the Pi Zero and its components is the perfect place to start before you start installing the Raspian Jessie Operating System on your Micro SD card.
You'll need to start by downloading Raspbian Jessie Operating from the Raspberry Pi downloads page (Adafruit provide you with a direct link to the latest version download)
Next double click to UNZIP the file!
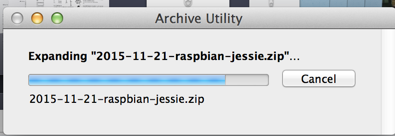
You should now have the following IMG file in your Downloads folder

Next we are going to download a special installer for MAC that the the folks from ADAFRUIT have shared called the PI SD installer for MAC -- (OMG.. this step is so amazingly more simple than the intimidating instruction on the RASPBERRY PI site for MAC -- THANK YOU- ADAFRUIT and Ray Viljoen!)
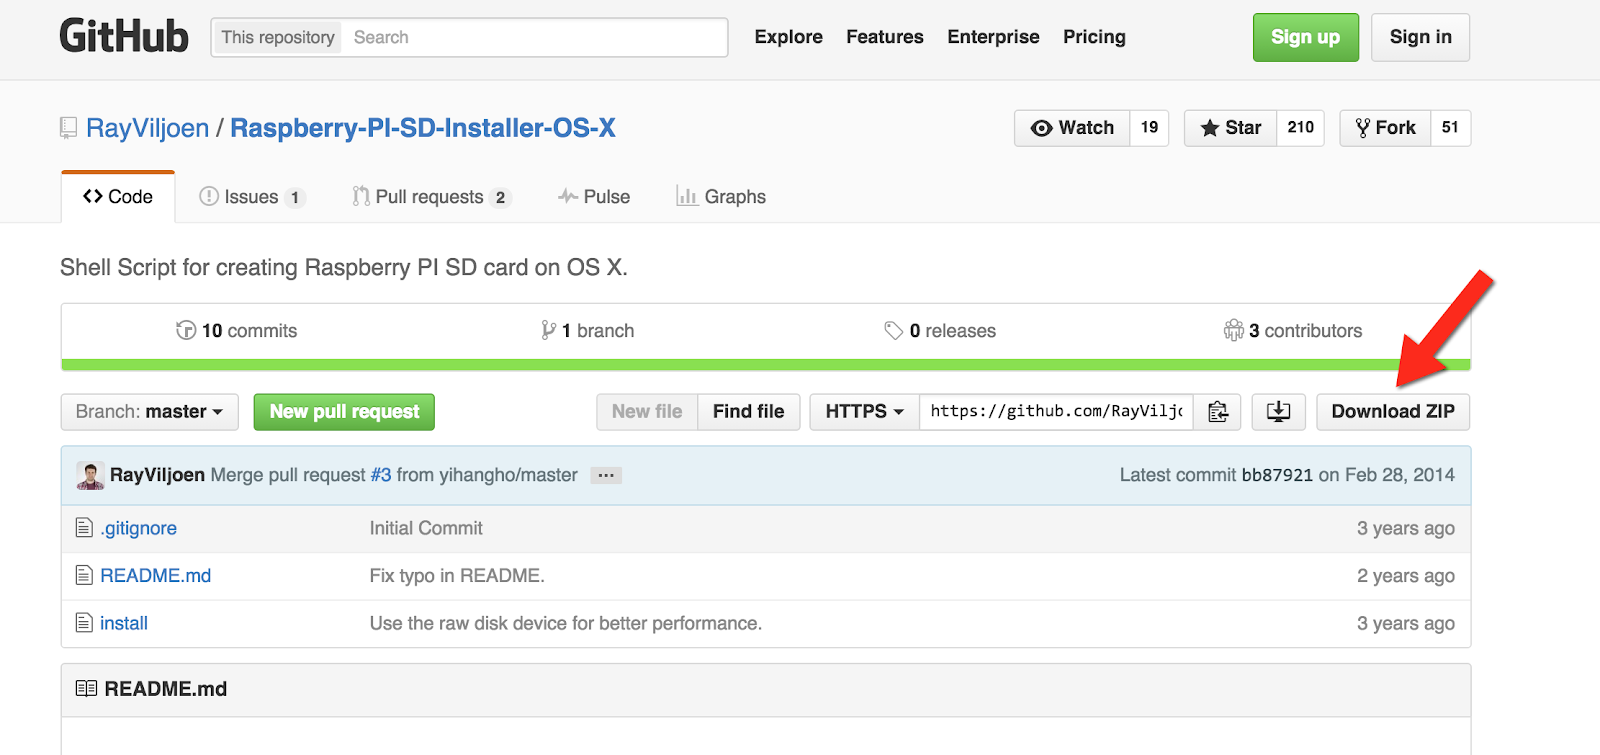
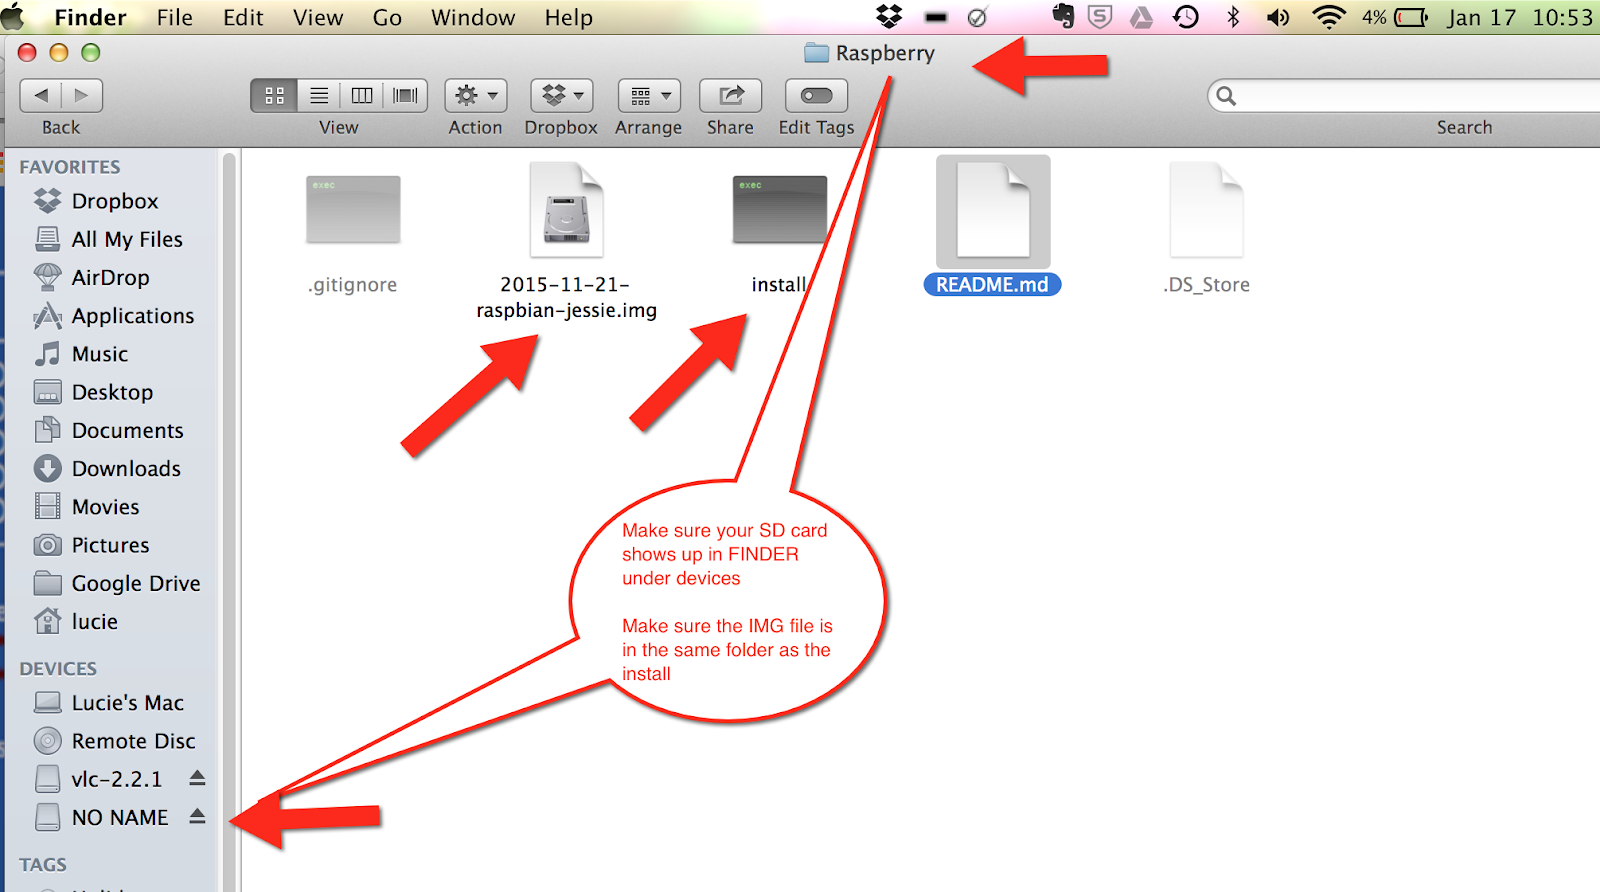
When you double click on the ZIP (or Extract the zip file), you will end up with a folder called 'Raspberry-PI-SD-Installer-OS-X-master'.
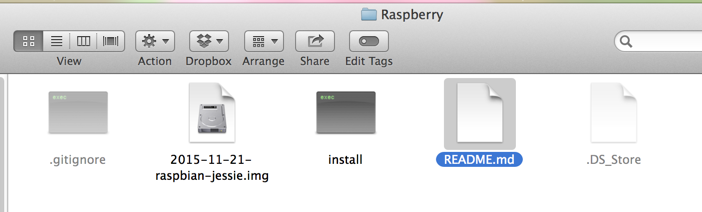
I renamed the Folder to RASPBERRY
to make it easy to work in some of the later steps where I found myself typing the name of the folder to navigate in the TERMINAL Window. (We’ll get to that later).
I then moved the Raspbian-jessie.img file that I had downloaded earlier into my Raspberry folder
So far -- So Good!
Now here comes the part that might be unfamiliar to some because it uses some UNiX commands -- but no worries, it just takes a little confidence and some attention to details to avoid typos.
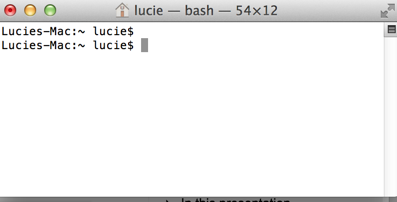
You need to find the TERMINAL WINDOW for your MAC.
I used the SPOTLIGHT window to search for the word TERMINAL and clicked on it to OPEN IT up.

It will open a little window that looks like this
You’ll also see the following back icon in your dock

If you have never used the terminal window before, try typing in a few UNIX commands (like the ones in RED) to get familiar with how the TERMINAL window works.
Last login: Wed Jan 20 10:36:51 on console
Lucies-Mac:~ lucie$ ls
Pictures
Desktop Public
Documents
Lucies-Mac:~ lucie$ pwd
/Users/lucie
Lucies-Mac:~ lucie$ cd -
/Users/lucie
Lucies-Mac:~ lucie$
|
Here are a few other UNIX Commands I find useful for beginners using the TERMINAL window.
CD to change Directory (folder)
LS to see what is in a Directory (folder)
CD ~ to go back a directory
CD - to VIEW the name of the previous directory
CTRL Z to cancel a command
(I used this once I started the install and got some prompts that I wasn’t sure about such as which DRIVE I wanted to install. I didn’t want to hit enter and format the wrong drive, so I used CTRL Z and went on to do more research)
CTRL+Z stops (pauses) a job
CTRL+C terminates a job with CTRL+C you cannot resume the process but with CTRL+Z the job can be resumed by just entering at the command prompt
Command: ls
Use this command to display the files within the current directory.
Command: ls -a
This command shows all files in a directory, both visible and invisible. All files preceded by a period are normally invisible, and are not normally displayed when using ls. These files are often called dot files and are initialization files for the various programs. Some examples might be:
Command: pwd
The pwd stands for "present working directory" and shows what directory you are in. It indicates the exact path from the root. The root is the top level of the unix file system, similar to the desktop on a Macintosh, or C:\ on a PC
|
Now that you are warmed up using the Terminal Window, let’s get back to our Raspberry Pi Project!
Make sure that you have the SD CARD INSERTED into your MAC and that you KNOW the NAME of the SD CARD. If you are not sure.. eject the card.. inspect your Finder window to see which DISK has disappeared and then put it back in to see which DISK appears.
Great.. you now have the information you need to continue.
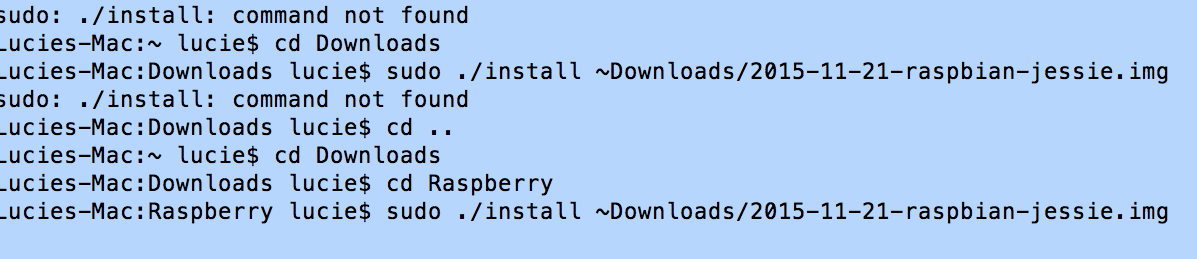
In the Terminal Window, type in the following command

CD RASPBERRY to change over to the RASPBERRY folder
LS to make sure you are see the files located in the RASPBERRY FOLDER
Then type in the INSTALL command you see in Green in the image below carefully typing in name of the jessie image file that is in your folder.
Don’t forget to hit ENTER or RETURN.


A prompt will appear asking for you to input the SD card Disk number ! Caution: Use the correct one!!
If you use the wrong one, you could wipe out your HARD DRIVE on your MAC.
I know.. this sounds scary.. but just take a breath and pay attention and you'll be fine!
Note that on MY installation I knew it was Disk 7 because of the in the size column I noted a disk with the size (7.4). Remember that I started with an 8 SD card --- close enough!
But guess what - I wanted to feel more confident, so instead of moving forward, I used CTRL Z to cancel the whole install process, pulled out the SD card, and redid the process and noticed there was no Disk 7. Then I cancelled again, and redid the install using Disk 7 with confidence!
It took me a few tries and a little UNIX refresher to get the command to work because I was in the wrong folder when I started.
I’m pasting my false start below.. in case it helps you to see the corrections I needed to make to get it right!
I’m pasting my false start below.. in case it helps you to see the corrections I needed to make to get it right!
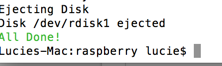
But after I got it right.. it took a few minutes to finish. Be patient!
You’ll know its done when you get the following
ALL Done message!
You’ll know its done when you get the following
ALL Done message!
Congratulations! You are ready to insert your microSD card with the new RASPIAN JESSIE operating system into your Pi Zero. Of course, you’ll need to hook up power, a monitor or display option, a USB adapter and USB mouse.
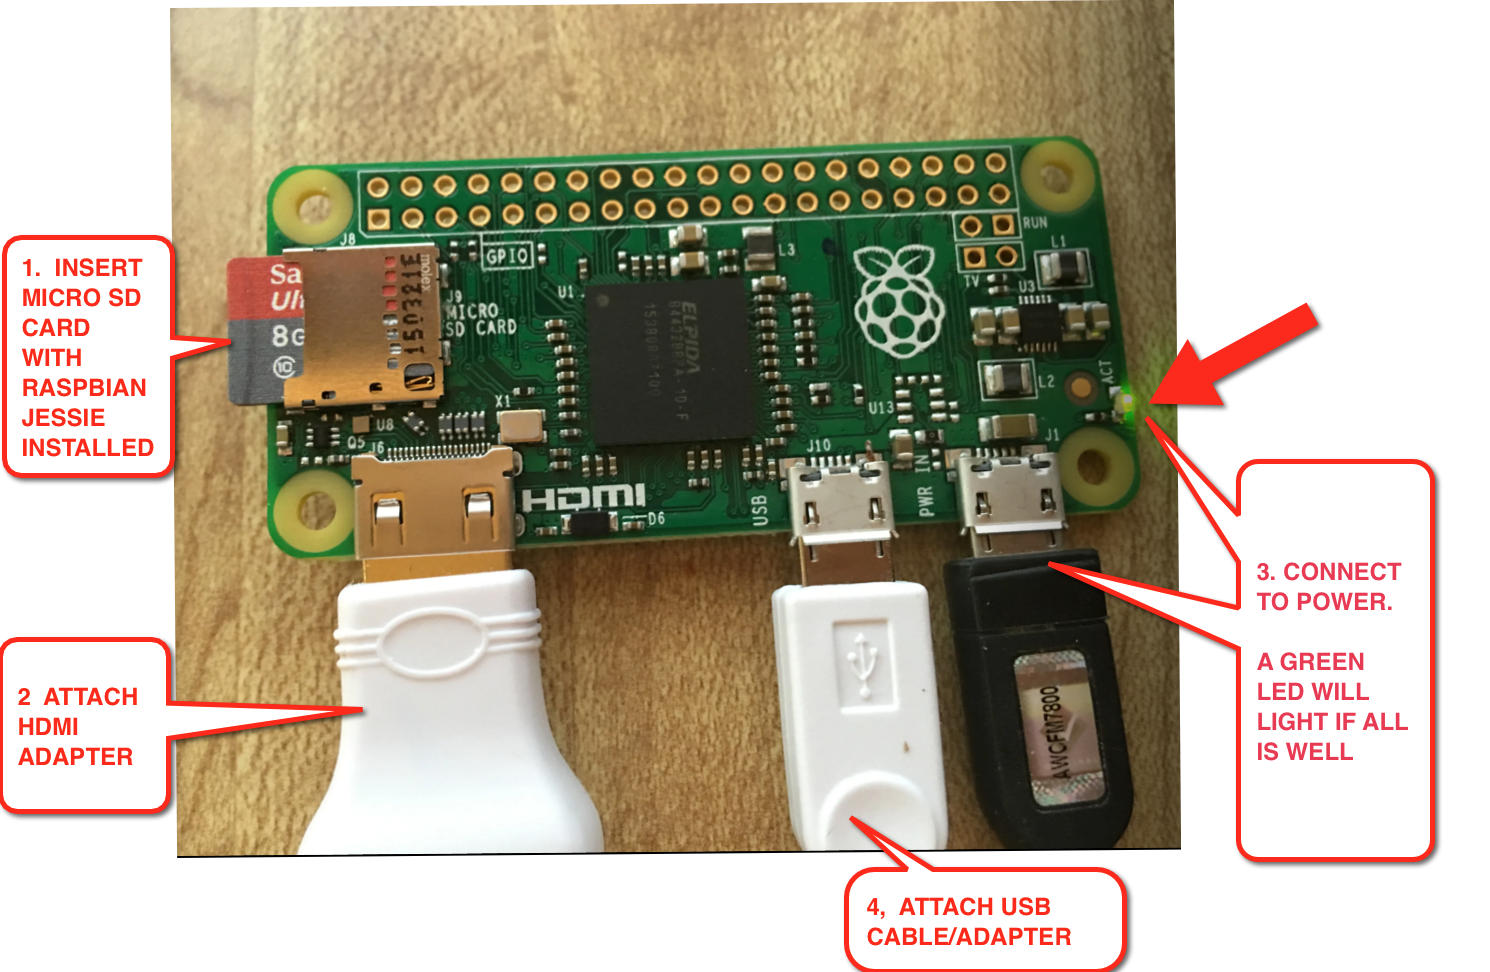
THEN connect to POWER so that the Raspberry Pi can sense that a monitor is attached and figure out what resolution the monitor is set to.
(You might remember from my last post,. that this can be a bit tricky).
If all goes well --- after a few minutes of WAIT time.. you will see a slew of text flying past you and then get a screen that looks like this.
Hopefully this is the case for you. As I mentioned in my last post, I experienced a chicken and egg dilemma trying to get my display to work and installing the OS. You can’t do one without the other. You can’t test whether your OS install went well without a display; but you can’t test if your display is compatible with your Pi Zero without the OS.
I’m assuming all is well and that you will not experience this dilemma.. unfortunately I did and I’ll share how I resolved it in an upcoming post.
But first I need to post my journey for Installing the OS for Raspberry Pi Zero for those using a Windows computer.
Oh.. and just a reminder for those who might not have seen the first post… this series is meant to give less experienced users the CONFIDENCE they need to move forward with their Raspberry Pi. There are lots of great resources out there - but it’s so easy to miss a step if you are a new user and from experience I know that one misstep can cause you to lose confidence. So in this series, I try to point out areas that a new user might need to pay special attention to stay confident and to show my own errors as a way to model how a my Raspberry PI journey helped me develop my growth mindset and build my confidence as a maker / educator.
Hope that this post might guide new users along their journey.
No comments:
Post a Comment